 |
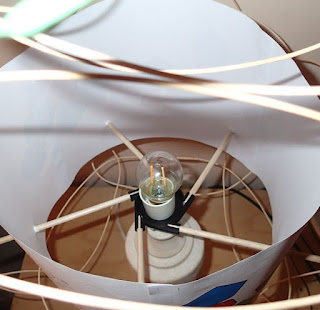
| Lampshade for Design Fringe........ |
 |
| Uses this black 3d printed centre piece...... |
 |
| which is repurposed here in the MKI CD-Matic |
 |
| made mostly from makittoy |
Hi
A few weeks ago, I was making a lampshade using some 3d printed bits I'd designed and made, and decided to play around with them a bit, and made a "thing" with the help of some Makittoy kits I have kicking around the kitchen. I had some left over bits of 6mm dowel which were used as the rods to connect the 2 sides, and the other rods and connectors were Makittoy.
It didn't really seem to have a use, so I put it on the kitchen table and used it to support a cylindrical Makittoy container. My girlfriend Mary, who'd seen me make the thing, later, and much to my delight - put some cd's on it.
Aha - this is the killer app for this thing, and I made a small paper label for it saying K-Tel CD-Matic, something I stole (the K-tel bit) and made up (the CD-matic bit, somewhat reminiscent of the K-Tel Record Selecta)
And you know, being an engineer, just making a thing like that is not enough, I had to make it better, and drew and made some corner pieces for the new CD-matic, and replicated all the Makittoy rod lengths in 6mm dowel as a start on a new MKII Cd-Matic
Coincidentally at about the same I did Mary a demo of 3d printing by uploading some prints from thingiverse with the theme of Newfoundland dogs. (Yes, there is everything!) One design in particular (here) lent itself to printing in 2 colours to make the raised section at the top contrast with the lower base, and I managed to print off a few "Newfie" tags like that and pass them on to Mary.
So the "Newfie" tags got me using a technique I hadn't used before, and I decided to use it to make the labels for the Cd-matic. Its quite tricky swapping over colours in the printer as it takes a minute or two to cut the filament of the first colour, feed the second colour into the extruder, and for the extruder to start churning out the second colour, so my first attempt failed to have a second colour. Second and third attempts were better though, by the time I had started them I'd put in a wide border around the part which uses a bit more filament and makes the timing less critical.
With the new labels on, Cd-Matic was ready to go!


No comments:
Post a Comment