 |
1. Pattern from my first post on this subject. It shows a continuous loop, of a form that can make a tetrahedron like shape. There are 4 triangular nodes, and 3 edges with cane crossings, and 3 without.
| | | |
|
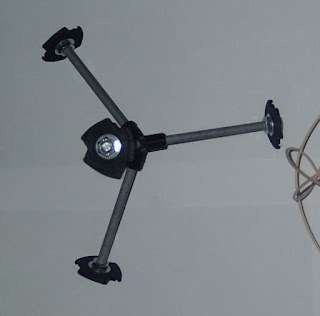 |
2. I wanted to make the shape shown in 1. in 3d from cane but didn't think I could with the jigs I had previously. What was built along these lines previously was a 4 loop version of the same part, and I used 4 discrete jigs for that. This pic shows the revised jig, * The previous jig design was changed, so that there is now an 8mm central hole, * A central tetrahedral jig was designed and made, so that 8mm allthread rod fits into the 4 sockets. * 8mm allthread rod was added, so that the outer rods ends are at the corner points of a tetrahedron. * Lastly, the new black jigs were bolted securely in place.
|
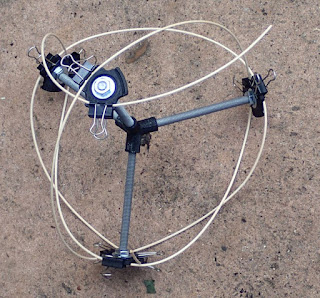 |
3. Then starting with some cane poking into thin air, the cane was pressed into the black jigs and clipped in place. I made 3 crossing edges and 3 that didn't cross.
|
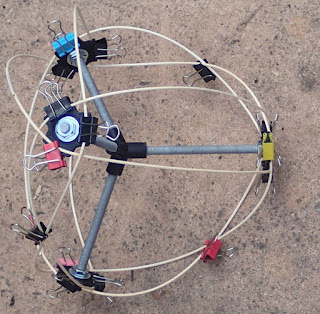 |
4. I needed to lengthen the cane a bit, so added an "invisible" join from clear heat shrink, but besides that, the whole thing can be made in 1 loop with 1 start / end join. In this photo, the loop is ready for gluing so the jig can be removed, and it looks like
|
 |
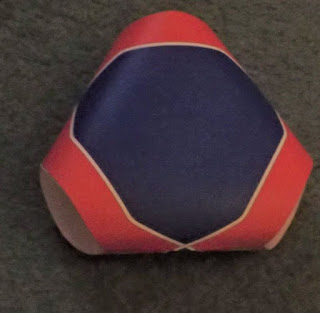
5. This!
|
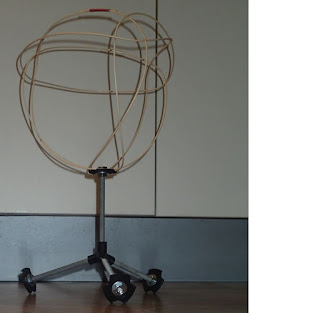 |
6. Here it is again. The jig makes a nice stand for the cane loop, as the corner sits snugly in place without glueing or clamping.
|
Hi. More 3d printing and weaving! Regards Steve Nurse
Update June 15.
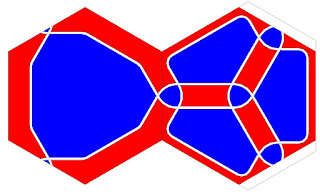
When I started looking at the cane weaving I had made, (5 and 6) I started wondering what sort of polyhedron I had made. The 4 loop version ( 19 to 22 here) was a cuboctahedron, what is the one loop version? As answer of sorts I made some diagrams this morning, some highly modified versions of pic 1 above with different colours representing triangles, rectangles and pentagons (topology, not the actual number of sides). They are shown on 7 and 8.
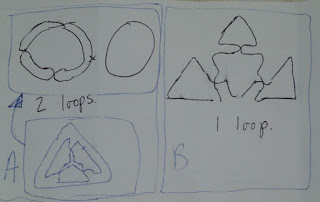
There are lots of different ways of changing the number of loops in the basic cuboctahedron, and I thought of a couple that would preserve symmetry and sketched them by hand, and as per 9a and b below. Plan to make these at some stage. Also make more diagrams as per 7 and 8.
Regards
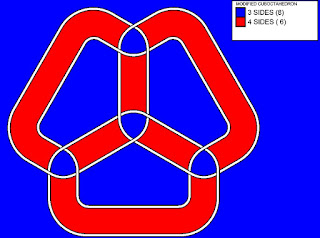 |
| 7. |
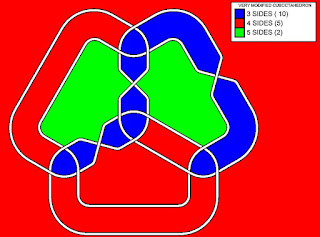 |
| 8. |
 |
| 9. |
Update 17/6/2022
 |
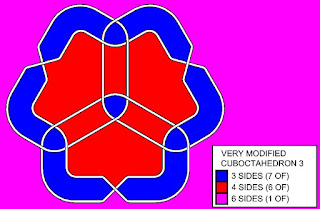
10. is the same thing as 9a
|
 |
11. is the same thing as 9b
|
 |
12. I wanted to explain the type of pic I made in 7, 8. 10, 11, where the outside border of the paper "doesn't count as sides". I was trying for a flat part printed both sides. "A" is the start, the same as fig 7 above and fig 10 on this page. "B" starts to divide it up, inside the hexagon will go to one side of the paper, outside the hexagon will go on the other.
|
 |
13. Here, "A" is starting to construct the shape that will go on side 1, "B" is the finished side 1 construction and "C" is side 2.
|
 |
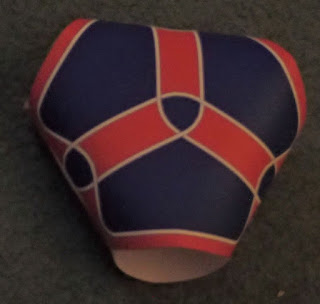
14. Finished result. Blue = topologically 3 sided, red = topologically 4 sided. Some extra tabs were added to make the final form,
|
 |
15. Which is here
|
 |
16. and here. I didn't have to fold it flat, I manged to tape edges together to make a 3d shape.
|
(Link to next post)


No comments:
Post a Comment